Looking for a cheap and fun way to relax those sore muscles? Whether you’re tired from work, sore after a workout, or just love a good massage, making your own massager at home is surprisingly easy — and super satisfying.
In this guide, we’ll walk you through two DIY options:
- A simple, no-motor massager you can make in minutes
- A vibrating massager if you’re feeling a bit more hands-on
Let’s dive in!
Table of Contents
Option 1: DIY No-Motor Handheld Massager
This one’s great if you just want something quick and easy using stuff you might already have at home.
🧰 What You’ll Need:
- 2 tennis balls or lacrosse balls
- A long sock or nylon stocking
- Duct tape or string (optional, for extra hold)
🔧 How to Make It:
- Drop both balls into the sock, one after the other.
- Tie a knot in the sock so the balls stay snug next to each other.
- (Optional) Wrap some duct tape or string around the balls to keep them from shifting.
That’s it! You’ve just made a super effective back or neck massager.
💡 How to Use It:
- Place the sock on the floor and lie down with the balls on either side of your spine.
- Roll slowly up and down to work out knots.
- Or hold the ends and roll it over your legs, arms, or shoulders.

Option 2: DIY Vibrating Massager
Want something with a little more “buzz”? This version uses a small motor for added relief.
🧰 Materials You’ll Need:
| Item | Where to Find It |
|---|---|
| Small DC motor (3–12V) | Old toy, electric toothbrush, or Amazon |
| Unbalanced weight (e.g. washer) | Any small metal bit |
| Wooden dowel or PVC pipe | Hardware store |
| Battery pack or USB cable | Online or from old electronics |
| Electrical tape or zip ties | Hardware store |
| Foam ball or tennis ball | Sports store or home |
| Glue gun (optional) | For stronger attachment |
🔧 Step-by-Step Instructions:
- Prep the Motor
- Attach the unbalanced weight to the motor shaft (this makes it vibrate when spinning).
- Build the Handle
- Use a short PVC pipe or wooden dowel as the handle.
- Drill a small hole or glue the motor to the end.
- Attach the Massage Head
- Glue or tape the foam or tennis ball to the motor end.
- Wire the Motor
- Connect it to a battery pack or USB power source.
- Tape or zip-tie everything down securely.
- Test it Out!
- Flip the switch and gently press the massager on sore muscles.
⚠️ Safety Tips:
- Don’t use it for more than a few minutes at a time to prevent overheating.
- Avoid using on injuries or near water.
- Test on a soft area first to get used to the vibration strength.
Why Make Your Own Massager?
Besides saving money, there are some cool perks to going the DIY route:
✅ Cost-effective – Uses stuff you already have
✅ Customizable – Make it your size, shape, and strength
✅ Fun & creative – It’s oddly satisfying to build your own tool
✅ Portable – Especially the non-electric version
✅ Effective – Helps relieve muscle tension, improve circulation, and reduce stress
Quick Tips for Using Your DIY Massager
| Tip | Why It Helps |
|---|---|
| Start light | Avoid bruising or soreness |
| Use oil/lotion | Smoother glide on skin |
| Focus on tension spots | Like neck, shoulders, calves |
| Relax and breathe | Helps your muscles loosen up |
| Take breaks | Don’t overdo it — 5–10 minutes at a time is plenty |
FAQ
How long does it take to make?
- No-motor version: 5 minutes
- Motorized version: 30–60 minutes
Can I use anything besides tennis balls?
Yes! Try foam rollers, lacrosse balls, or even rubber bouncy balls.
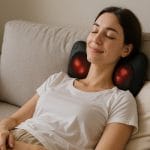
What kind of relief can I expect?
- Eases muscle tightness
- Reduces tension and stress
- Can improve sleep and energy
Is it safe?
As long as you’re not using it on injuries, broken skin, or sensitive areas — yes! Just listen to your body and don’t push too hard.
Don’t Feel Like Building One?
Totally fine! You can buy simple massage tools online for under $20, including:
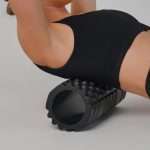
- Foam rollers
- Massage sticks
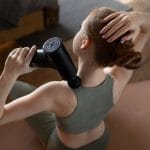
- Electric handheld massagers
- Trigger point balls
Final Thoughts
Making your own massager is a fun, low-cost way to take better care of yourself. Whether you go simple with a sock and tennis balls or techy with a buzzing motor, you’ll end up with a tool that helps you feel better — and that you built with your own two hands.
Got questions or want more DIY wellness tips? Drop a comment or reach out — happy to help!
Disclaimer
This DIY guide is only intended to provide information and should not be considered professional medical advice. It is the reader’s responsibility to determine the safety, effectiveness and appropriateness of any of the instructions provided. Consult with your doctor before attempting to make your own massager.
References
⚠️ Disclaimer:
This article is for informational purposes only and does not constitute medical advice. Always consult with a licensed healthcare provider or certified massage therapist before beginning any new treatment, especially if you have pre-existing health conditions or concerns.